Reversing a video on your iPhone can add a unique twist to your social media posts, school projects, or creative films. Whether you want to make someone appear to walk backward or add an intriguing effect to your story, learning how to reverse videos on an iPhone is a nifty skill. Let’s dive into what video reversal is and why it’s so popular.
What is Video Reversal?
- Definition of Video Reversal:
Video reversal means playing a video backward. Imagine a ball being thrown into the air; in a reversed video, it would look like the ball is flying back into the thrower’s hand.
- Common Uses of Reversed Videos in Social Media and Filmmaking:
Reversed videos are popular in short video types, they create eye-catching effects that make simple actions look magical or funny. In filmmaking, directors use video reversal to show events happening in reverse, like water flowing upward, to add a surreal or dreamlike quality to scenes.
- Benefits of Reversing Videos for Creative Projects:
Reversing videos can enhance creativity. It allows you to:
- Create Unique Visual Effects: Make everyday actions look extraordinary.
- Add Humor: Simple actions can become hilarious when played backward.
- Enhance Storytelling: Use reverse effects to depict flashbacks or dream sequences.
Reversing a video on your iPhone offers endless possibilities for creativity and fun. Understanding these basics will help you make the most of this technique in your projects.
How to Reverse a Video Using iMovie
Step-by-Step Guide
Step 1: Open iMovie and Create a New Project:
- Launch iMovie on your iPhone. If you don’t already have it, download it from the App Store. Upon opening, tap the “+” button to start a new project. Select “Movie” to open the project workspace.
Step 2: Import the Video Clip You Want to Reverse:
- Tap on “Import Media” and navigate to the video clip you wish to reverse. This will usually be in your Photos app. Select the video and it will appear in your project timeline.
Step 3: Select the Video Clip in the Timeline:
- Tap on the video clip in the timeline to highlight it. This action will bring up various editing options at the bottom of the screen.
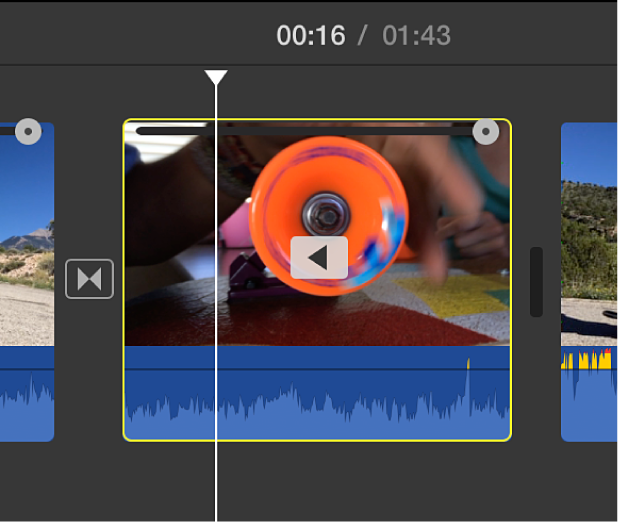
Step 4: Use the Reverse Option Under the Speedometer Tab:
- Tap the “Speedometer” icon, which represents the speed adjustment tools. Look for the option to reverse the clip. Tap on it, and iMovie will automatically reverse the video playback.
Step 5: Export the Reversed Video:
- Once you’re satisfied with the reversed video, tap “Done” in the upper-left corner. Then, tap the “Share” button, which looks like a box with an arrow pointing upwards. Choose “Save Video” to export the reversed video back to your Photos app.

Picture sources:https://support.apple.com/
Tips and Tricks
- Adjusting Playback Speed for Smoother Reversal:
You might notice that reversing a video can sometimes make it look choppy or unnatural. To fix this, adjust the playback speed. In the Speedometer tab, you can slow down or speed up the reversed video until it looks smooth. Experiment with different speeds to see what works best for your footage.
- Editing Audio Separately if Needed:
Reversing a video also reverses the audio, which can sound odd. You have two options: mute the original audio or replace it with a new track. To mute, tap the “Volume” icon and drag the slider to zero. If you prefer adding new audio, tap the “Audio” button, select a new track, and synchronize it with your reversed video. This way, you can enhance the final product with suitable background music or sound effects.
By following these steps and tips, you can create a polished, professional-looking reversed video using iMovie on your iPhone. This tool provides a straightforward way to add creative effects to your videos without needing advanced editing skills.
Zeemo Makes Your Video Better
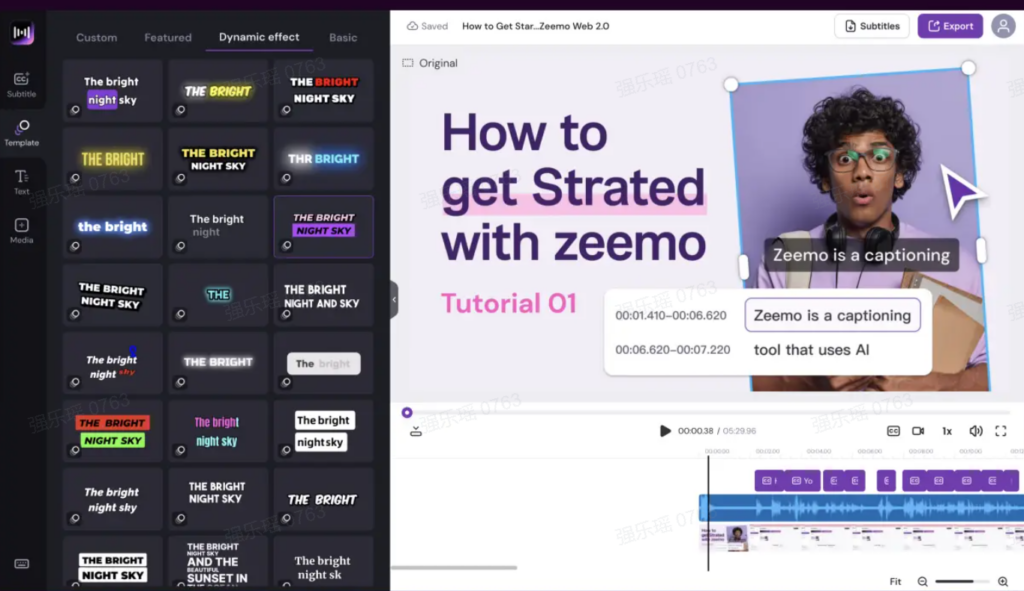
A study by Plymedia showed that subtitles can increase a video’s views by a staggering 40%. The same study found that people were 80 percent more likely to watch a video until the end when subtitles were included.If you’re looking to take your videos to the next level, consider adding captions or subtitles. Zeemo is an AI subtitling tool specifically for video creators with powerful translation functions and cool caption effects:
- Automatic translation of video/audio subtitles;
- A large number of subtitle-style templates;
- A lot of attractive caption effects make your video stand out
Not only do captions make your content more accessible to a wider audience, but they also boost engagement and improve overall watch time. Discover how easy it is to add subtitles to video with Zeemo or explore the benefits of automatic captioning for your videos.

How to Reverse a Video Using Third-Party Apps
While iMovie is a powerful tool, several third-party apps offer additional features for reversing videos on iPhone. These apps are user-friendly and provide various editing tools that can make your videos stand out. Some popular choices include Videoleap, Reverse Vid.
Step-by-Step Guide for Each App:
- Videoleap:
- Download and Open Videoleap: Get the app from the App Store and open it.
- Create a New Project: Tap the “+” button to start a new project.
- Import Your Video: Select the video clip from your camera roll.
- Reverse the Video: Tap the “Edit” icon, then choose the “Reverse” option. The app will process the video.
- Save the Video: Tap the “Export” button to save your reversed video to your camera roll.
- Reverse Vid:
- Install and Launch Reverse Vid: Download from the App Store and open the app.
- Select Video: Tap “Choose from Library” and pick the video you want to reverse.
- Reverse and Adjust Speed: Tap “Reverse” and select the playback speed.
- Save Your Video: Tap the “Save” button to store the reversed video on your iPhone.
Using third-party apps can provide enhanced functionality and creative options for reversing videos on your iPhone. While some apps may require a subscription for full access, they often offer a broader range of tools than iMovie.
Advanced Editing Techniques
Combining Reversed Video Clips with Forward Clips for Creative Effects
Mixing reversed video clips with forward clips can produce visually captivating and unique effects. This technique is often used in music videos and short films to create a surreal or dream-like atmosphere.
- Create a Back-and-Forth Loop: Select a segment of your video, reverse it, and then place the reversed clip immediately after the original. This creates a back-and-forth loop that can highlight specific actions or moments.
- Transition Between Reversed and Forward Clips: Use smooth transitions to switch between reversed and forward clips. This can make the change less jarring and more visually appealing.
Adding Transitions and Visual Effects to Reversed Videos
Enhancing your reversed videos with transitions and visual effects can add a professional touch. Here’s how you can elevate your video:
- Fade In/Fade Out: Apply fade-in and fade-out effects at the beginning and end of your reversed clip to create a seamless entry and exit.
- Overlay Effects: Use overlays like light leaks, lens flares, or glitch effects to add a creative layer to your video. These effects can draw attention to specific parts of the video.
Steps to Add Transitions:
- Select Transition: In your video editing app, choose a transition effect from the options available.
- Apply to Clips: Drag and drop the transition between the clips where you want to create a smooth change.
- Adjust Duration: Customize the duration of the transition to ensure it fits well with the timing of your clips.
Using Color Correction and Filters to Enhance Reversed Videos
Color correction and filters can significantly improve the overall look of your reversed video. Adjusting colors can set the mood and tone, making your video more engaging.
- Basic Color Correction: Adjust brightness, contrast, saturation, and exposure to balance your video’s look.
- Applying Filters: Use pre-set filters to quickly change the aesthetic of your video. Filters can add a vintage look, a cinematic feel, or a vibrant pop of color.
Steps for Color Correction:
- Open Color Correction Tools: Access the color correction tools in your editing app.
- Adjust Settings: Fine-tune the brightness, contrast, and saturation to enhance the visual quality.
- Apply Filters: Browse through the available filters and apply one that matches the desired style of your video.
Integrating Reversed Videos into Larger Projects
Incorporating reversed videos into larger projects can add depth and creativity to your content. This technique is useful in storytelling, creating flashbacks, or showing alternate perspectives.
- Use as Flashbacks: Reversed clips can serve as flashbacks in a narrative, providing a unique way to depict past events.
- Background Elements: Integrate reversed clips as background elements in larger scenes to add complexity and intrigue.
- Highlight Actions: Use reversed clips to highlight specific actions or moments, making them stand out in the overall project.
Steps to Integrate into Larger Projects:
- Import Reversed Clips: Import your reversed clips into your main project timeline.
- Position Clips: Place the reversed clips strategically within your project to enhance the narrative or visual appeal.
- Blend with Other Elements: Use transitions, overlays, and audio to blend the reversed clips seamlessly with the rest of your project.
By mastering these advanced editing techniques, you can create impressive and engaging videos that stand out. Combining reversed clips with forward motion, adding transitions and effects, applying color correction, and integrating into larger projects will elevate your video editing skills.
Resource:
Playmedia:https://www.linkedin.com/pulse/powerful-impact-subtitles-video-content-junefirst/


